Sustain / Real Bread Campaign / Recipes
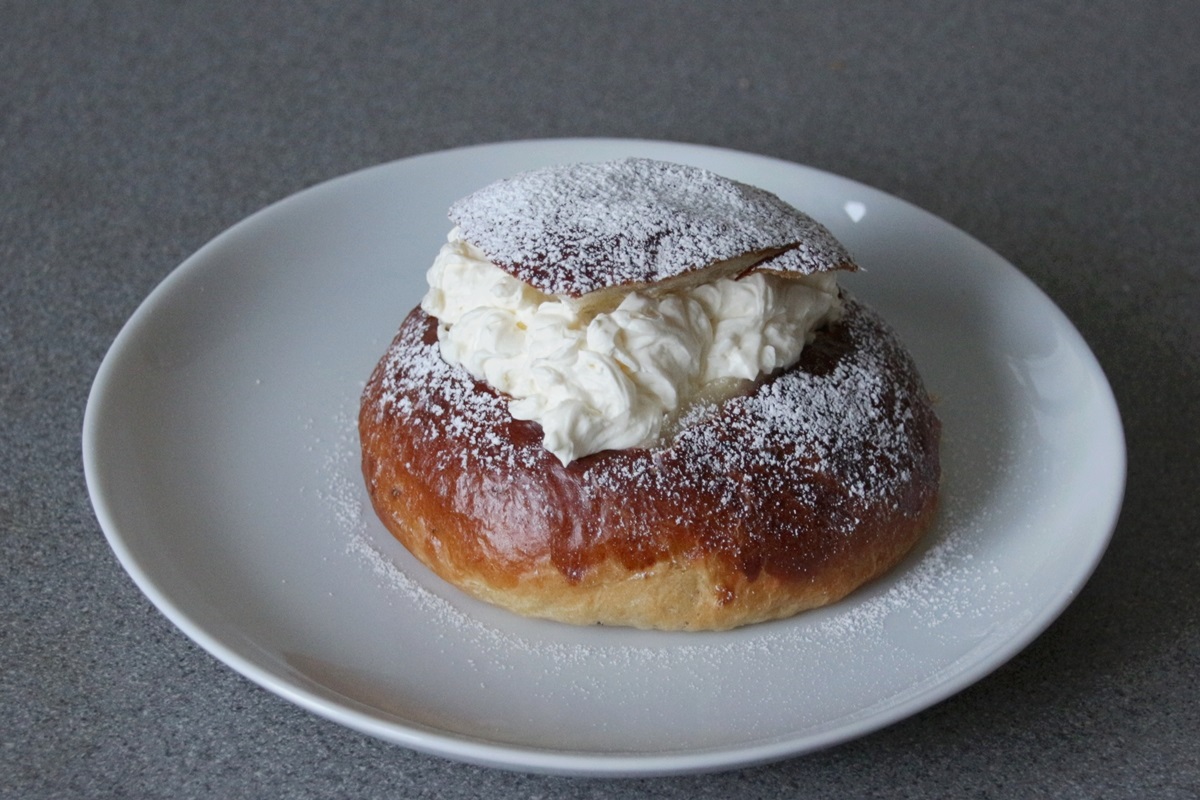
Cream-filled cardamom buns
AKA laskiaispullat, semlor and fastelavnsboller
While cardamom and cinnamon buns are eaten year-round in Nordic countries, historically filling them with cream and something sweet was reserved for Shrove Tuesday. Laskiaispullat are to Finland, semlor to Sweden and fastelavnsboller to Norway as pancakes are to Britain. Finns typically partner the cream with jam, while Swedes and Norwegians opt for a spreadable almond paste. Not a thing to be eaten often or in quantity...
When and how cardamom first made its way from south western India to become embedded in baking traditions of the far north is uncertain. Some historians believe it to have involved trading between Viking and Byzantine merchants.
You can find a slower-rising version of pulla dough in our book Slow Dough: Real Bread.
Ingredients
Makes about 15-18 buns
Dough
600g White strong / bread flour
500g Milk
140g Butter
100g Sugar
21g Fresh (or 10g dried active or 7g fast-acting*) yeast
2-3g Crushed green cardamom seeds (about 2tsp)
Cream
300ml Double or whipping cream
1tbs Caster sugar (vanilla, if you have it)
¼tsp Vanilla extract
Almond paste
150g Ground almonds
100g Caster sugar
½tsp Crushed green cardamom seeds
Enough water to loosen
…or just get a jar of strawberry or raspberry jam.
Finishing
1 Egg (for glazing - optional)
Some Icing sugar
*Read the label and avoid any that contains additives, which would put your bakes outside the Campaign’s Real Bread criteria.
Method
Warm the milk, butter, sugar and cardamom in a pan and heat gently until the butter has melted. Leave to cool until lukewarm.
If using fresh or dried active yeast, disperse it in the milk mixture. If using fast-acting yeast, put it straight into the flour.
Pour the milk mixture into the flour and beat with a fork, or mixer if you have one. At first the dough is really sloppy – almost a batter - but as the gluten develops it will tighten up, become silky and stretchy and come away from the sides of the bowl. Cover the bowl (eg with a shower cap or carrier bag that you can reuse again and again) and leave the dough to rest for half an hour or so.
Scoop the dough up (with a wetted dough scraper, if you have one) stretch and fold over itself, then turn the bowl 90° and do the same again. Repeat this action a few times, which will develop the gluten and strengthen the dough. You can find videos demonstrating how on the internet. Cover again and leave at room temperature to prove. Depending on what temperature your room is (mine is usually about 19-20°C) proving the dough should take 2-4 hours in all. During this time, you can repeat the stretch‘n’fold action every now and then to make the dough firmer for shaping and the final rise.
Lay baking paper/parchment on a couple of large baking trays. Scale the dough into equal pieces - 50g for small buns or up to 100g for very large ones. With very lightly floured hands, shape the dough into balls by pulling two opposite corners into the centre, then repeat with the other two corners. Turn the dough over and roll into a ball with a clawed hand to tighten the outside of the dough, either against the palm over your other hand – again, you can look up a video online ‘cos we haven’t got round to producing one… Place the balls on the lined trays, leaving at least 5cm of space all around each one as they’ll spread out a bit during the final rise and then expand even more during baking. Cover and leave the dough balls for one or two hours they’re fully risen.
Heat the oven to about 200°C. If using, beat the egg fully and brush over the top of each bun.
Put the trays into the oven and bake for ten minutes. Turn the trays around for even baking and if the buns are looking dark already, turn the oven down by 10°C. Bake for a further 5 minutes. Remove the buns to a wire rack and leave to cool completely before filling.
Whisk the cream, sugar and vanilla extract together until it forms stiff peaks.
If you’re going down the Swedish or Norwegian route, blitz the almonds, sugar and cardamom together (eg using a stick blender) with enough water to make a smooth-ish paste. Otherwise, open the jam jar…
Cut a little ‘hat’ off the top off each bun - Finns usually slice straight across, while Swedes tend to go for a triangular titfer. Spread a teaspoon or two of either almond paste or jam on each bun, followed by a generous dollop (use a piping bag, if you can be bothered) of cream. Put the hats on and lightly dust each bun with icing sugar.
Baker’s Tips
These are best eaten on the day of baking but can be frozen (unfilled) to eat at a later date. If, somehow, any end up going stale, they're good toasted, in place of brioche as the base for a bostock-like thing, or used for bread and butter pudding.
To save bakers the faff of peeling and crushing cardamom seeds themselves, shops in Nordic countries sell jars, packets or tubes of the stuff. You can find them in specialist shops elsewhere and online. Otherwise, get out your mortar and pestle or spice grinder – you’re aiming to crack the seeds into gritty particles, rather than reduce to a fine powder.
Etymology
The words boller (sing. bollen) and pullat (one of umpteen plurals of pulla) meaning buns come from a proto-Indo-European root that has resulted in words for all sorts of roundish objects (from balls to bowls to bubbles to testicles) across present day European languages.
The etymological origin of Laskiainen, the pre-Christian Finnish winter sliding festival that became conflated with Shrove Tuesday, is thought to be a proto-Finnic (and ultimately proto-Uralic) root meaning to fall, descend or go down, as in sledging down a hill.
Like simnel and semolina, semla (pl. semlor) comes from Latin simila, meaning wheat flour. Fastelavn comes from a Germanic root meaning fast evening.
Recipe text © Chris Young / www.realbreadcampaign.org
Reproduction prohibited without written permission of the copyright holder.
Social sharing
If you make this, please share your photo(s) with the world on social media using #RealBread and other relevant hashtags, linking back to this recipe. Better still if we can see you in the photo, too: #WeAreRealBread!
Please don't forget to tag us, and the recipe's author. You can find us on:
- Twitter: @RealBread
- Instagram: @RealBreadCampaign
- Facebook: @RealBreadCampaign
Published Sunday 14 February 2021
Real Bread Campaign: Finding and sharing ways to make bread better for us, our communities and planet.


