Sustain / Real Bread Campaign / Recipes
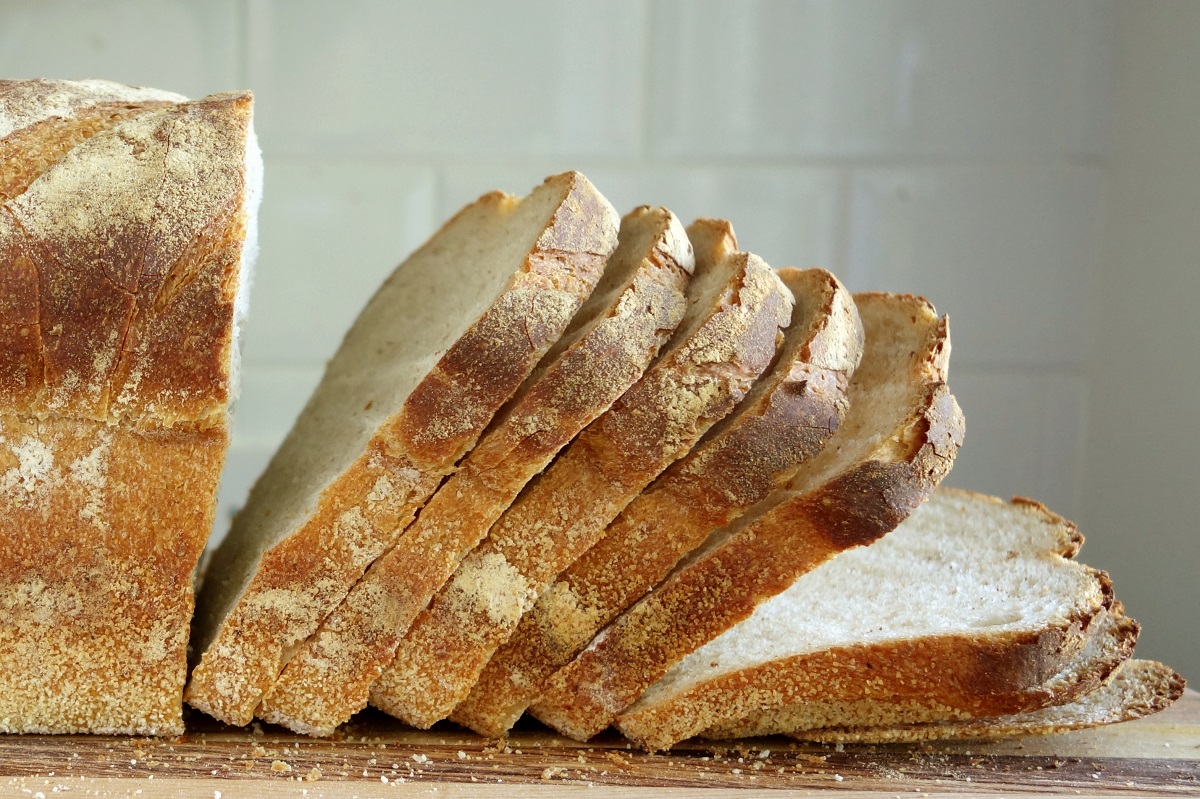
Real Bread without bread flour
In answer to the question ‘can I make Real Bread with plain flour?'

…yes.
This recipe was published in April 2020 as part of the Real Bread Campaign's #LockdownLoafers initiative.
Introduction
What is often sold as bread (or strong) flour is milled from wheat and has a relatively high (usually around 12-14%) protein content. These proteins include glutenins and gliadins that, with the addition of water, come together to form gluten. This is the stretchy, elastic stuff that traps bubbles of the carbon dioxide produced by a sourdough starter, or baker’s yeast, to make dough rise.
Plain (similar to the US all-purpose) flour may be milled from different varieties of wheat, has less (perhaps 8-10%) protein and and so lower amounts of those that form gluten.
Things that help you to make the most of the protein that is there and develop gluten include:
- Water
- Time
- Stretching and folding
See notes below on getting gluten going.
Ingredients
Makes one largish (about 700g) loaf, or a couple of small ones
500g Plain flour*
325g Water straight from the tap
6g Salt (about one level 5ml teaspoon)
5g Fresh (or 1tsp quick**) yeast
*This also works with brown flour; white or wholemeal strong/bread flour; or mixtures. Bran in brown and wholemeal flour sucks up water, so you’ll find it works better with a few percent more water. See note on other substitutions below.
**Read the label and avoid those that contain any additives.
Method
Basically: Mix, leave, stretch every now and then, shape, bake.
Weigh the water in a bowl and stir in the salt and yeast (no, it won’t kill them) until dispersed.
Weigh the flour and mix with the rest of the ingredients. No need to knead – you can stop once you have a shaggy dough but there’s no dry flour left.
Cover the bowl (eg with a carrier bag that you can reuse again and again) and leave to rest for half an hour or so.
Scoop the dough out of the bowl with a wetted dough scraper, or your hand, stretch it and fold it in half, then repeat this action. You can find videos demonstrating how on t’internet. Place the dough back in the bowl and cover again.
Leave at room temperature to prove/rise. Depending on what temperature your room is (mine was about 19-20°C when I did tests of this bread) this might be seven or eight hours. During this time, repeat the stretch’n’fold action every now and then. You could do it hourly or every other hour, but doesn’t have to be that often.
Shape the dough however you like eg for an oiled tin, banneton, or free-standing on an oiled baking tray. Again, the intermesh is full of how-to videos. Cover and leave for two or three hours until it’s fully risen.
Heat the oven (with a baking stone or tray in place if you’re proving dough in a banneton) to about 220°C.
If proved in a banneton, utrn the dough onto a dusted peel or board. Dust the top of the dough with flour, if you like, and/or slash it with a lame/grignette or murderously sharp knife and then put straight into the oven.
Bake a large loaf for about 45 minutes, or small ones for about half an hour. Turn out onto a wire rack and leave to cool before slicing – bread can be gummy and lose a lot of moisture if you cut when hot.
Getting gluten going
Whatever wheat flour you use, there are a few key things you can do to really develop its proteins into an stretchy but elastic gluten network that will enable it to rise well.
Water
The biochemical magic that turns proteins in wheat flour into gluten requires water. Some home baking (particularly sandwich loaf) recipes call less water than professional (and other experienced) Real Bread bakers use. I’ve started here with 65% hydration (water weighing 0.65 of the weight of the flour), but as you get used to wetter doughs, you can try increasing this up to 70% hydration (ie 350g in this case) or more. At higher levels, you enter into the territory of no-knead bread, then up to almost batter-like focaccia and crumpet doughs.
Time
Two key factors in the time a dough needs to prove and rise are temperature and yeast. Warmer proving and/or more yeast will make the dough rise more quickly, while less yeast and/or lower temperature mean the dough will need longer. For this loaf, forget the airing cupboard or cool oven – you can even prove it in the fridge overnight, if you like.
The added benefit for you of long proving is that you don’t have to worry about it. None of this needing to hang around to be on duty to do something every forty five minutes. Leave the dough for an extra hour or so and it’ll be fine. I start long-ferment loaves in the morning and get on with my life, giving it a fold if I happen to be passing, shaping late in the afternoon and baking a few hours later when the oven is on for dinner.
Stretching and folding
Though proteins in wheat flour will form gluten will form if given water and time, mechanical action will aid the process. You could knead at the start but, especially with lower protein flour and higher hydration doughs, this can get messy. Better to mix the ingredients and then leave the dough for half an hour or so, before scooping it up, stretching it, folding it over and leaving it again. Do this every now and then during the day and you’ll end up with a lovely, silky, stretchy dough with little effort.
Substitutions
In answer any ‘can I…’ questions about swapping or adding ingredients, the answer is almost certainly yes, you can. Every tweak you make creates a different recipe that will give you slightly (or greatly) different results.
Seek out recipes for those alternative combinations of ingredients or experiment for yourself. If you come up with a new bread that you love, please share it and your tips on social media!
Recipe © Chris Young / www.realbreadcampaign.org
Reproduction prohibited without written permission of the copyright holder.
Social sharing
If you make this, please share your photo(s) with the world on social media using #RealBread and other relevant hashtags, linking back to this recipe. Better still if we can see you in the photo, too: #WeAreRealBread!
Please don't forget to tag us, and the recipe's author. You can find us on:
- Twitter: @RealBread
- Instagram: @RealBreadCampaign
- Facebook: @RealBreadCampaign
Published Wednesday 1 April 2020
Real Bread Campaign: The Real Bread Campaign finds and shares ways to make bread better for us, better for our communities and better for the planet. Whether your interest is local food, community-focussed small enterprises, honest labelling, therapeutic baking, or simply tasty toast, everyone is invited to become a Campaign supporter.


