Sustain / Real Bread Campaign / Recipes
Ruisleipä
Finnish-style malted wholegrain rye sourdough bread
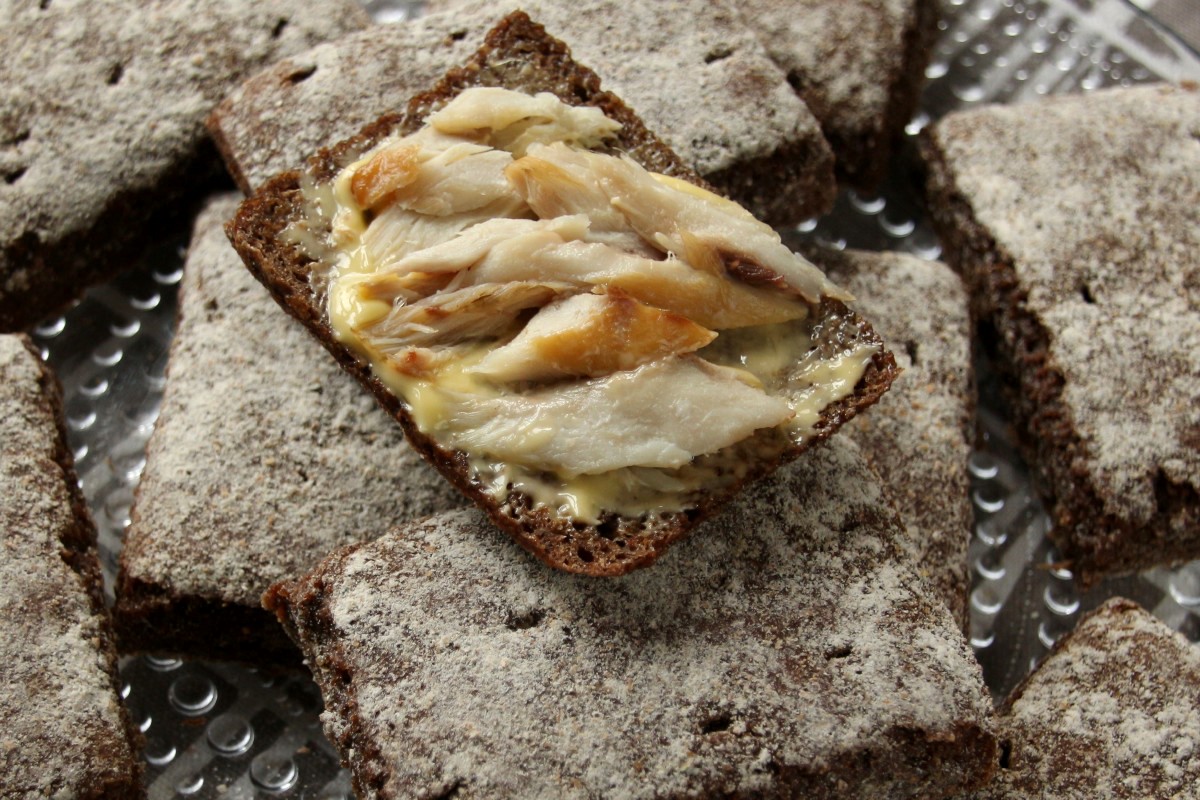
During England’s lockdown 2.0, I found a bag of rye malt flour living out its post-best-before-date days at the back of my cupboard, which inspired me to try recreating a type of ruisleipä (rye bread) that’s ubiquitous in Finland. It’s even produced by the country’s largest baked goods manufacturers* - under names including Ruispalat, Reissumies and Puikula - and available from small shops and supermarkets across the land.
I think I got pretty close…
*Typically from a mix of rye and other cereals and leaved with baker’s yeast, though without the use of additives, industrial loaf fabricators please note…
Ingredients
500g Wholemeal rye flour, plus extra for dusting
450g Water
200g Refreshed rye starter (100% hydration, ie 1:1 water and rye flour)
100g Rye malt flour
12g Salt
Method
Basically, mix everything together, leave it to prove, spread it out on a greased tray, prove again, bake.
- Mix all of the ingredients together in a bowl until they are fully combined into a putty-like dough – no need to knead.
- Cover and leave to prove. Made with slightly warm water and left at an ambient temperature of 20-21°C, 5 hours did the trick.
- Grease a low-walled, 40x30cm baking tray/sheet and spread the dough out on it to a depth of about 1cm using oiled hands and/or dough scraper.
- Dust with rye flour, cover loosely and leave for a second proof until risen to about 1.5-2cm. At an ambient temperature of 20-21°C, this took about another 5 hours.
- Heat the oven to 210°C (about 200°C if fan-assisted)
- Dock (prick) the dough all over using a skewer, then divide it into even-sized rectangles by pushing a dough scraper right down to the tray.
- Bake for 15-20 minutes
- Leave to cool on a wire rack covered by a clean tea towel, couche cloth or similar, then transfer into a bread bin, bag or container.
Rye is even gummier than wheat bread just after baking, so try to leave it for at least 8-10 hours / overnight for before eating – see boxed text below. It tastes better after a day or two, anyway. Slice each piece laterally (ie separate crown from heel / top from bottom) just before serving.
This bread’s great topped with hot-smoked salmon, cheese, prawns, eggs or ham; or dunked in hernekeitto - pea and ham soup. Alternatively, simply spread with butter – for a Finnish touch mix finely-chopped, hard-boiled egg into softened butter to make munavoi. There must be vegan options that work well but I've not been offered or tried one.
Wait for it...
The crumb (inside) of bread is gummy after baking due to the hydrated and heated starch forming a sort of gel. Over time, the starch reverts to a crystalline structure through a process called retrogradation, which eventually contributes to the dry, stiff characteristics of stale bread. In the short term, however, it is best to leave bread for a number of hours to let the crumb cool and set, making it less gummy and so easier to slice.
This is even more important for rye bread, which is sticker (and tends to stale more slowly) than wheat because of rye flour’s higher proportion of pentosans - polysaccharides that ‘hold onto’ water well.
Baker’s Tips
Rye malt flour and chops/groats are available in the UK and (I guess) elsewhere – ask your favourite search engine to help you find a producer or stockist.
For more of a tang, you can make this in a two-stage process. Make a leaven the night before bake day using all of the starter and some of the total flour and water - eg 150g of each. The next morning add in (or the leaven to) the remainder of the ingredients.
Substitutions
In answer any ‘can I…’ questions about swapping or adding ingredients, adjusting times and temperature, the answer is yes, you can. Every tweak creates a different recipe that will give you different results. Seek out those recipes or experiment for yourself and, if you come up with a bread you love, please share it and your tips!
Recipe text © Chris Young / www.realbreadcampaign.org
Reproduction prohibited without written permission of the copyright holder.
Social sharing
If you make this, please share your photo(s) with the world on social media using #RealBread and other relevant hashtags, linking back to this recipe. Better still if we can see you in the photo, too: #WeAreRealBread!
Please don't forget to tag us, and the recipe's author. You can find us on:
- Twitter: @RealBread
- Instagram: @RealBreadCampaign
- Facebook: @RealBreadCampaign
Published Tuesday 1 December 2020
Real Bread Campaign: The Real Bread Campaign finds and shares ways to make bread better for us, better for our communities and better for the planet. Whether your interest is local food, community-focussed small enterprises, honest labelling, therapeutic baking, or simply tasty toast, everyone is invited to become a Campaign supporter.


